Image Stitching Field Test
- Jan 15, 2017
- 3 min read
The figure below shows the pictures taken by the SJ4000 mounted on the drone, which yawed 360° and captured 12 images, at 30° intervals.
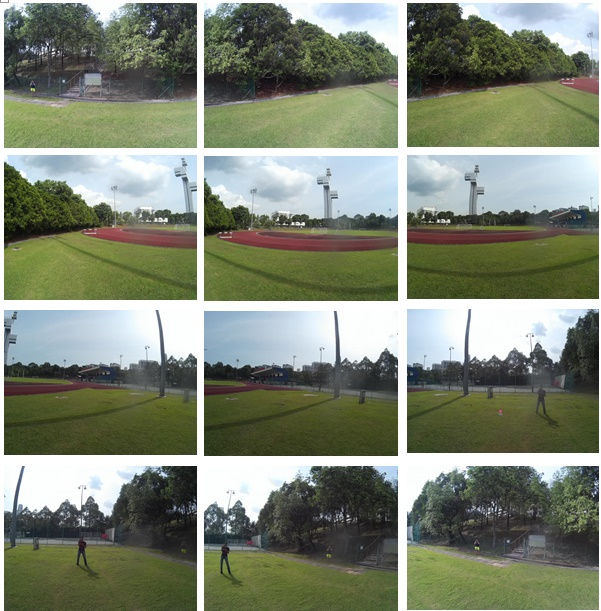
The sample array of pictures above captured from our drone is not very ideal as due to the drone’s frame not being of perfect stability due to an offset center of gravity, the autonomous yawing motion it underwent involved drifting away slightly from its original position due to wind. Nonetheless, by having these images available, we were then able to proceed with onboard stitching.
It should be noted that due to the instable yaw of the drone, the pictures taken did not allow the algorithm to produce a good output.
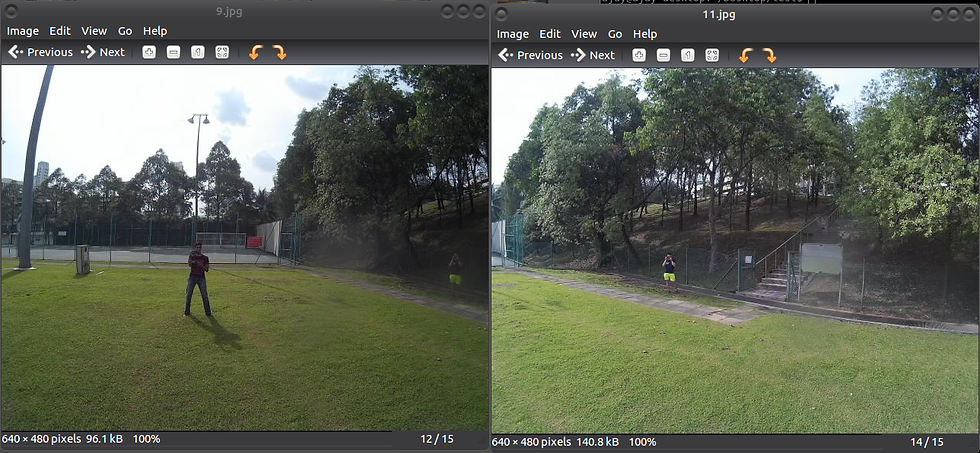
As can be seen in the figure above, these two pictures have different levels of brightness due to the drone yawing and facing away from the sung and hence its inner imaging circuitry balancing the change in the amount of photons being detected by the camera sensor. This hence causes it to attempt to balance the brightness, which results in the different as seen above. This, coupled with the fact that the drone drifted while yawing meant that the image stitch produced would not be of the best quality.

The stitched images resulted in a distinct vertical line boundary being seen through the middle of the image. This is due to the difference in brightness in both images and the algorithm, while looking for keypoints, is only able to detect similar edges and features, but cannot account for a difference in brightness.
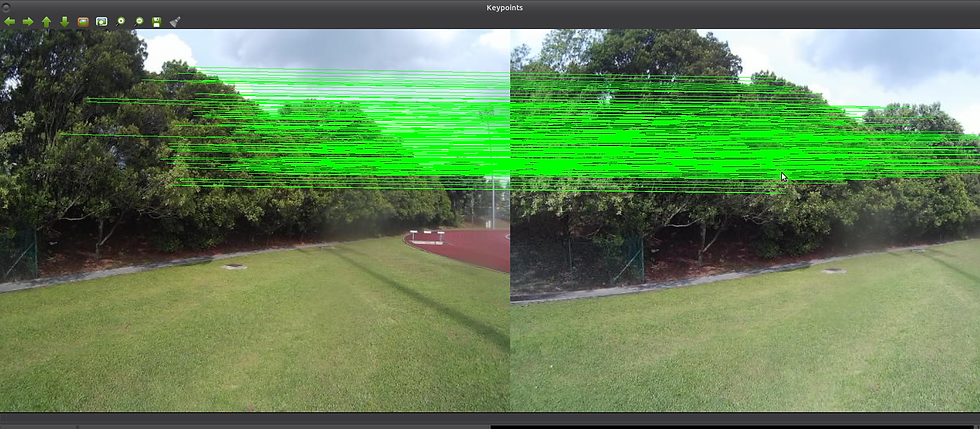
The figure above shows successful keypoint detection between two good images captured. These images were captured as the drone’s yaw was relatively stable. By being able to capture good images, the algorithm is able to stitch them well. The definition of good images would be images with a lot of corresponding similarities but enough differences in order to stitch them together. The various factors such as saturation, hue, and contrast should be similar in both images. This would then result in the following image to be stitched.
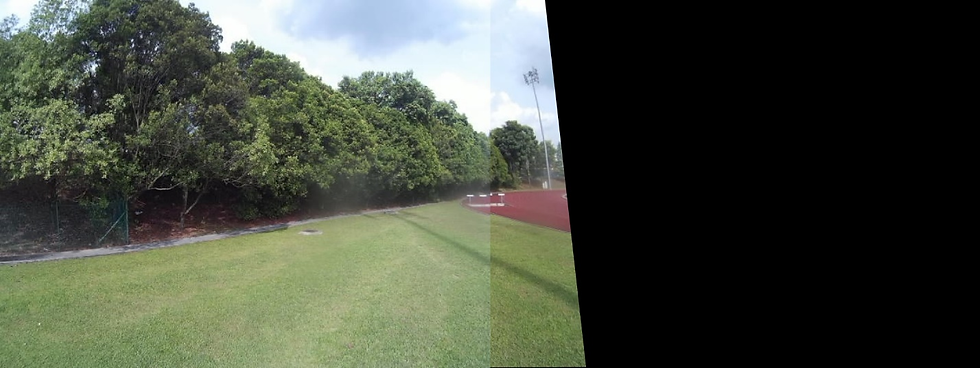
There is a diagonal line present in the image and a lot of black space towards the right, however stitching-wise, it was done with a decent accuracy. The next step is to crop out the picture and chain it with more pictures. Again, this is not an ideal image set to stitch due to the drone’s instability, which caused a slightly warped outcome with the black space.

As can be seen above, the four images were stitched into a decent panorama image. However, the right hand side of the image was stretched out due to the varying size of the objects in the left and the right. Due to these errors and inconsistencies in the stitching due to the instability of the drone’s yaw, the images stitched would carry forward a lot of the changes in size of the objects, saturation, brightness, and this would cause the final outcome to be rather poor.
However, with proper images taken, the final outcome would be a very well-stitched panorama image with very few inconsistencies. This is unfortunately a constraint of the algorithm as a prerequisite for it to work well is for the images to be of similar quality and for them to be captured in a fixed angle of rotation without much drifting.
The on-board image stitching took roughly two to three minutes to stitch each set of pictures together when they were resized to a width of 1000 pixels. With a computer boasting a more powerful processor, images can be stitched in merely a few seconds, even at large widths. However, this is not done during flight as it could cause the system to hang or be heavily delayed, which is very dangerous. Hence the stitching could still be done on-board, but only after the drone has landed and motors are disarmed.


Comments